Hardware setup troubleshooting
Use this section to solve any problems you might encounter while setting up the
HP All-in-One hardware.
My HP All-in-One does not turn on
Solution
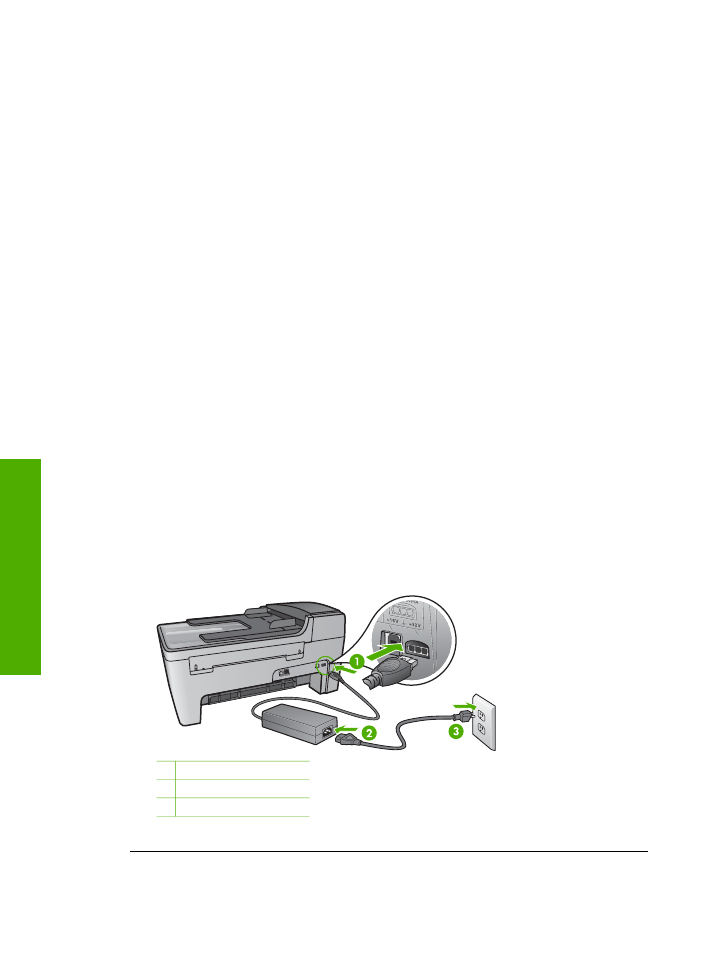
Make sure each of the power cords is firmly connected, and wait a
few seconds for the HP All-in-One to turn on. If this is the first time you have
turned on the HP All-in-One, it can take up to a minute to turn on. If the HP All-in-
One is plugged in to a power strip, make sure the power strip is turned on.
1 Power connection
2 Power adapter
3 Grounded power outlet
Chapter 11
90
HP Officejet 5600 All-in-One series
Troubleshooting
I connected the USB cable, but I am having problems using the HP All-in-One
with my computer
Solution
You must first install the software that came with your HP All-in-One
before connecting the USB cable. During installation, do not plug in the USB
cable until prompted by the onscreen instructions. Connecting the USB cable
before prompted can cause errors.
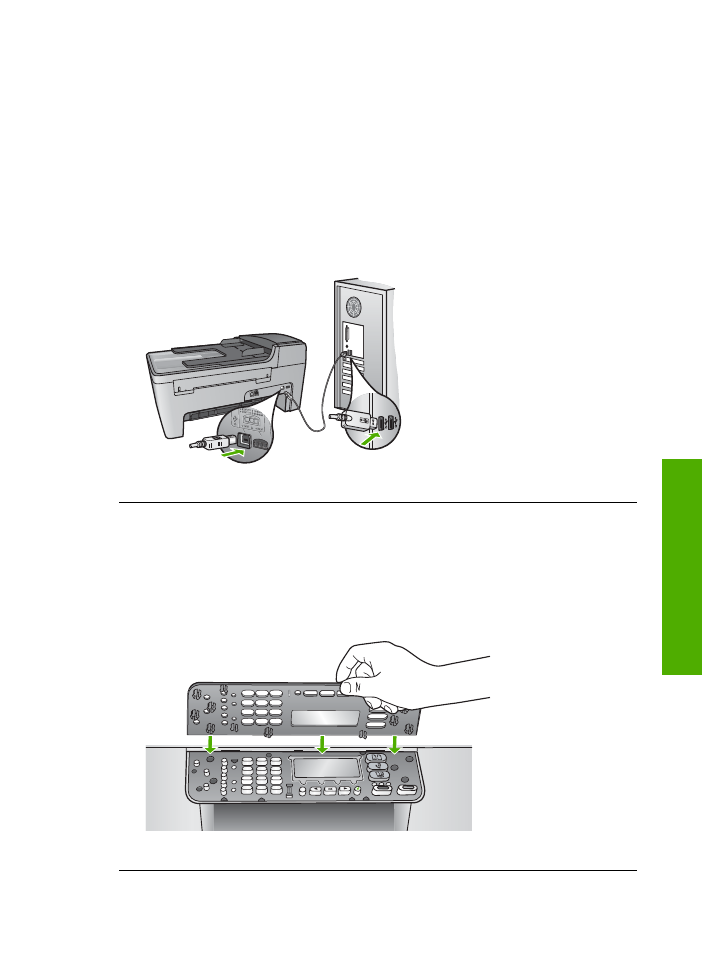
Once you have installed the software, connecting your computer to your HP All-in-
One with a USB cable is straightforward. Simply plug one end of the USB cable
into the back of your computer and the other into the back of the HP All-in-One.
You can connect to any USB port on the back of your computer. For more
information, see
Troubleshooting common setup issues
.
I received a message on the control panel display to attach the control panel
faceplate
Solution
This might mean the control panel faceplate is not attached, or it is
attached incorrectly. Make sure to align the faceplate over the buttons on the top
of the HP All-in-One and snap it firmly into place.
User Guide
91
Troubleshooting
The control panel display shows the wrong language
Solution
You can change the language settings at any time from the
Setup
Menu
. For more information, see
Set your language and country/region
.
The wrong measurements are showing in menus on the control panel display
Solution
You might have selected the incorrect country/region when setting up
your HP All-in-One. The country/region you select determines the paper sizes
shown on the control panel display.
To change the country/region, you must reset the language settings. You can
change the language settings at any time from the
Setup Menu
. For more
information, see
Set your language and country/region
.
I received a message on the control panel display to align the print cartridges
Solution
The HP All-in-One prompts you to align cartridges every time you
install a new print cartridge. For more information, see
Align the print cartridges
.
Note
If you remove and reinstall the same print cartridge, the HP All-in-
One will not prompt you to align the print cartridges. The HP All-in-One
remembers the alignment values for that print cartridge, so you do not
need to realign the print cartridges.
I received a message on the control panel display that the print cartridge
alignment failed
Cause
The incorrect type of paper is loaded in the input tray, for example,
colored paper, paper with text on it or certain recycled paper.
Solution
Load unused plain white letter or A4 paper into the input tray, and
then try the alignment again.
If the alignment fails again, you might have a defective sensor or print cartridge.
Contact HP Support. Go to
www.hp.com/support
. If prompted, choose your
country/region, and then click
Contact HP
for information on calling for technical
support.
Cause
Protective tape is covering the print cartridges.
Solution
Check each print cartridge. If the plastic tape is still covering the ink
nozzles, gently remove the plastic tape by using the pink pull tab. Do not touch
the ink nozzles or the copper-colored contacts.
Reinsert the print cartridges and verify that they are fully inserted and locked in
place.
For more information about installing print cartridges, see
Work with print cartridges
.
Chapter 11
92
HP Officejet 5600 All-in-One series
Troubleshooting
Cause
The contacts on the print cartridge are not touching the contacts in the
print carriage.
Solution
Remove and then reinsert the print cartridges. Verify that they are
fully inserted and locked in place.
Cause
The print cartridge or sensor is defective.
Solution
Contact HP Support. Go to
www.hp.com/support
. If prompted,
choose your country/region, and then click
Contact HP
for information on calling
for technical support.
The HP All-in-One does not print
Solution
If your HP All-in-One and computer are not communicating with each
other, try the following:
●
Check that the HP All-in-One print queue is not paused (Windows) or
stopped (Mac). If it is, choose the appropriate setting to resume printing. For
more information about accessing the print queue, see the documentation
that came with the operating system installed on your computer.
●
Check the USB cable. If you are using an older cable, it might not be working
properly. Try connecting it to another product to see if the USB cable works.
If you experience problems, the USB cable might need to be replaced. Also
verify that the cable does not exceed 3 meters (9.8 feet) in length.
●
Make sure your computer is USB ready. Some operating systems, such as
Windows 95 and Windows NT, do not support USB connections. Check the
documentation that came with your operating system for more information.
●
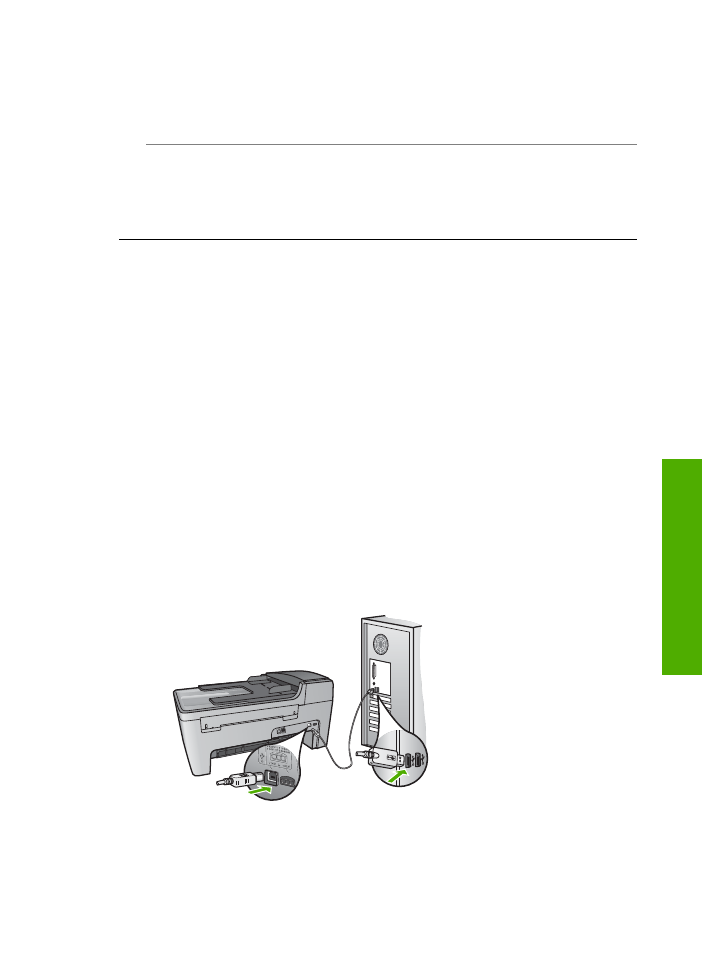
Check the connection from your HP All-in-One to your computer. Verify that
the USB cable is securely plugged into the USB port on the back of your
HP All-in-One. Make sure the other end of the USB cable is plugged into a
USB port on your computer. After the cable is connected properly, turn your
HP All-in-One off and then on again.
●
Check other printers or scanners. You might need to disconnect older
products from your computer.
User Guide
93
Troubleshooting
●
After you check the connections, try restarting your computer. Turn your
HP All-in-One off and then on again.
●
If necessary, remove and then install the
HP Image Zone
software again.
For more information, see
Uninstall and reinstall the software
.
For more information on setting up your HP All-in-One and connecting it to your
computer, see the Setup Guide that came with your HP All-in-One.
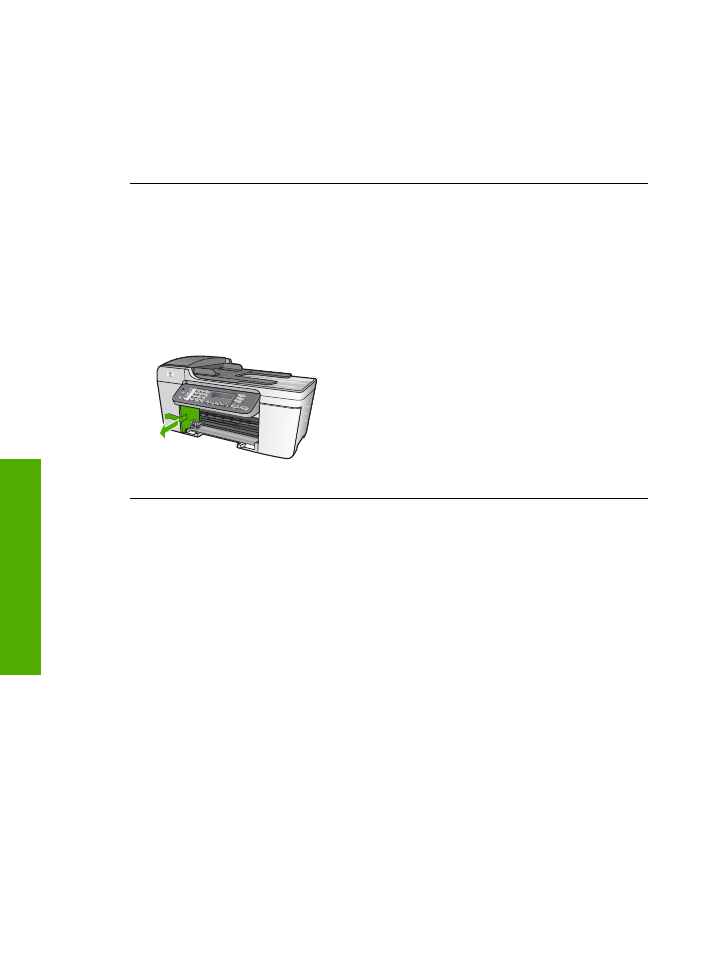
I received a message on the control panel display about a paper jam or a
blocked carriage
Solution
If either a paper jam or blocked carriage error message appears on
the control panel display, there might be some packing material inside the HP All-
in-One. Look inside the printer, including the print-carriage access door. The
shipping lock might still be in place on the left side of the HP All-in-One. Pull out
the shipping lock and throw it away.